A good lifestyle photo shows several products at once. The trouble is what happens next: a shopper likes the chair, the lamp and the throw, then has to search your catalogue for each one. Image Mapper – Shoppable Image fixes that by letting you place a small pin on each product in the photo. This guide takes you from an empty app to one working shoppable photo, with no code.
The app has one plan, with a 7-day free trial. The current price is on its App Store listing.
Part 1: How to set it up
Step 1: Install and turn on the app embed
Install the app and approve the charge. On the Shoppable Images page you will see a banner titled “Action Required: Activate Image Mapper in your Theme”.
- Click Activate in Theme (1-Click). The theme editor opens with Image Mapper Core already switched on.
- Click Save in the theme editor.
- Go back to the app and click Verify Activation. The banner disappears.

Without Image Mapper Core, nothing shows on your storefront.
Step 2: Pick a photo with several products
The app’s own help text says a good photo should have multiple products in it. A styled room or an outfit flat-lay both work. A single product gives you only one pin.
Step 3: Create the shoppable image
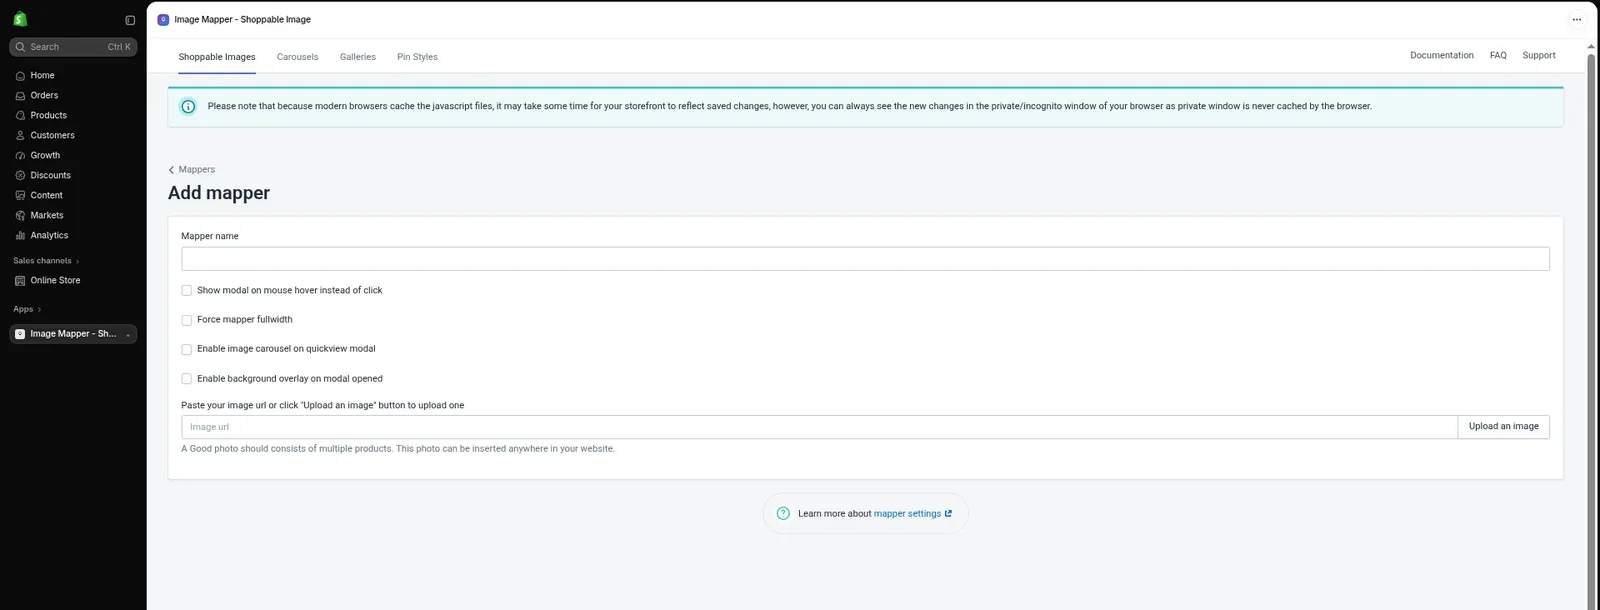
- On the Shoppable Images tab, click Add Shoppable Image.
- Type a Mapper name. This is for your own reference, and it is also used as the image alt text.
- Click Upload an image, or paste an address into the image URL field. Uploads go to your Shopify Files.
Step 4: Add a pin for each product
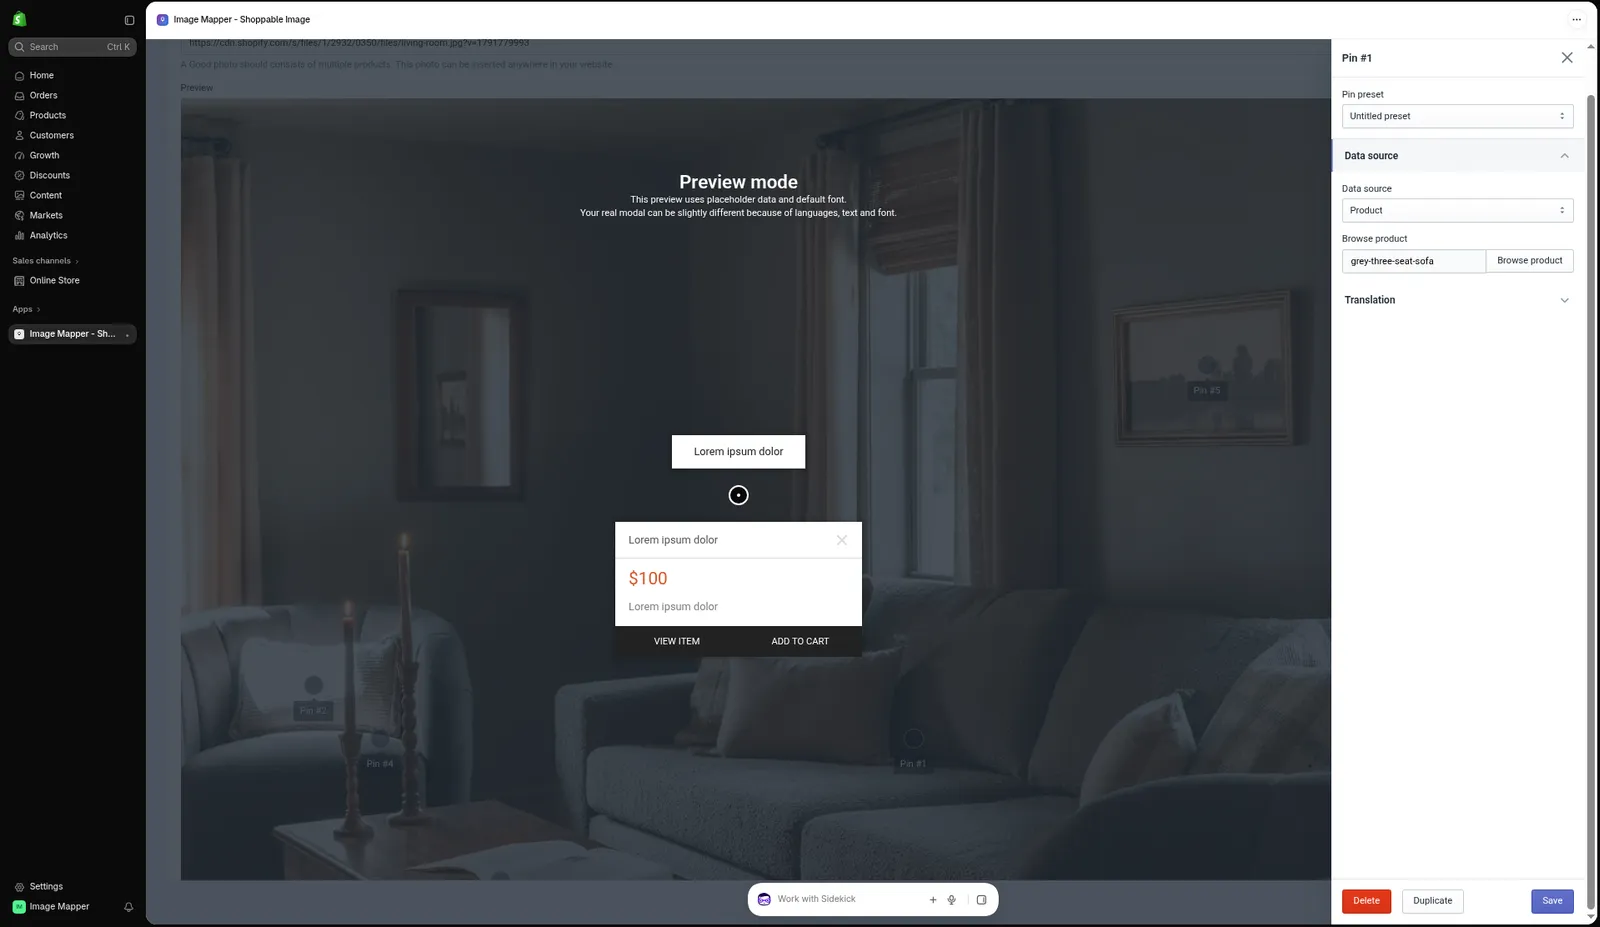
Once your image loads, a Preview panel appears.
- Click on the photo wherever you want a pin. Each click adds one.
- Drag a pin to fine-tune its spot.
- Click a pin to open its settings. Under Data source, keep Product selected and click Browse product to choose the product. If you skip this, the app shows “Product is required”.
- Click Save in the pin sheet.
- Repeat for every product you want shoppers to buy.
Step 5: Choose the optional switches
On the same page you can turn on:
- Show modal on mouse hover instead of click
- Force mapper fullwidth
- Enable image carousel on quickview modal
- Enable background overlay on modal opened
All four are off by default. Part 2 shows what each one does.
Click Save and Continue Editing. A new image takes you to the Install Shoppable Image page.
Step 6: Add it to your page
- On the Install Shoppable Image page, click Copy ID under Method 1.
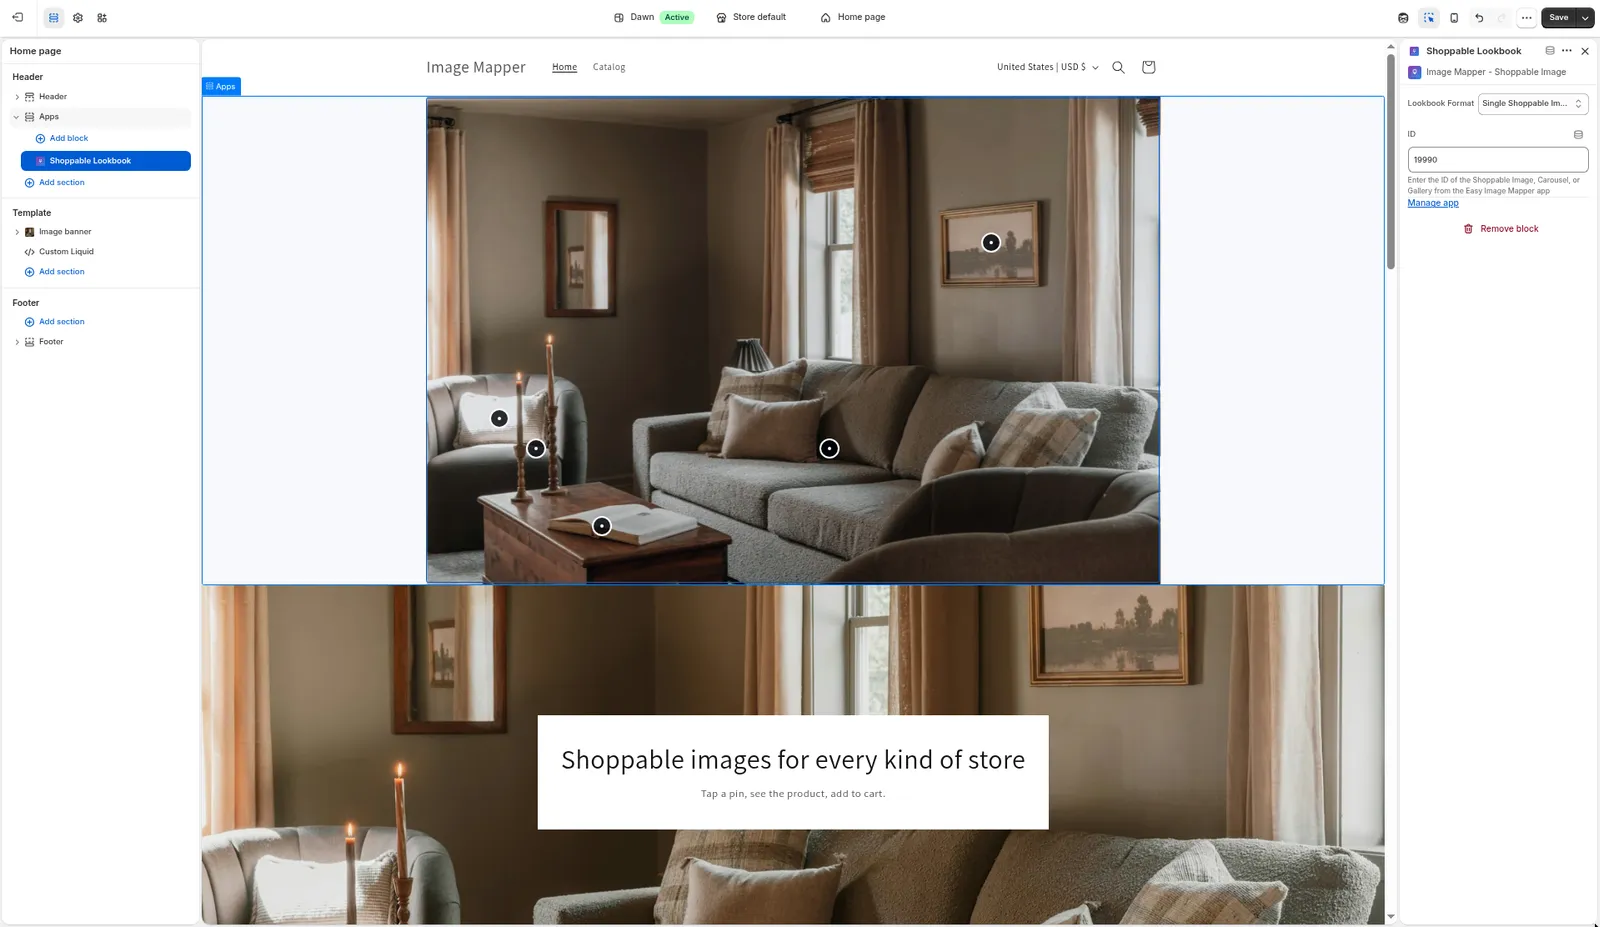
- Open your theme editor (Online Store, Themes, Customize) and go to the page where you want the photo.
- Click Add section or Add block, open the Apps tab and choose Shoppable Lookbook.
- Set Lookbook Format to Single Shoppable Image, paste the number into ID and click Save.
For a blog post or an older theme, use Method 2 on the same page instead. It gives you an HTML snippet to paste, and the Image Mapper Core embed still needs to be on.
Step 7: Check it in a private window
Browsers keep copies of the app’s files, so a normal tab may show an older version. The app suggests a private (incognito) window. The server cache can also delay changes by up to about 5 minutes.
Part 2: What your shoppers see
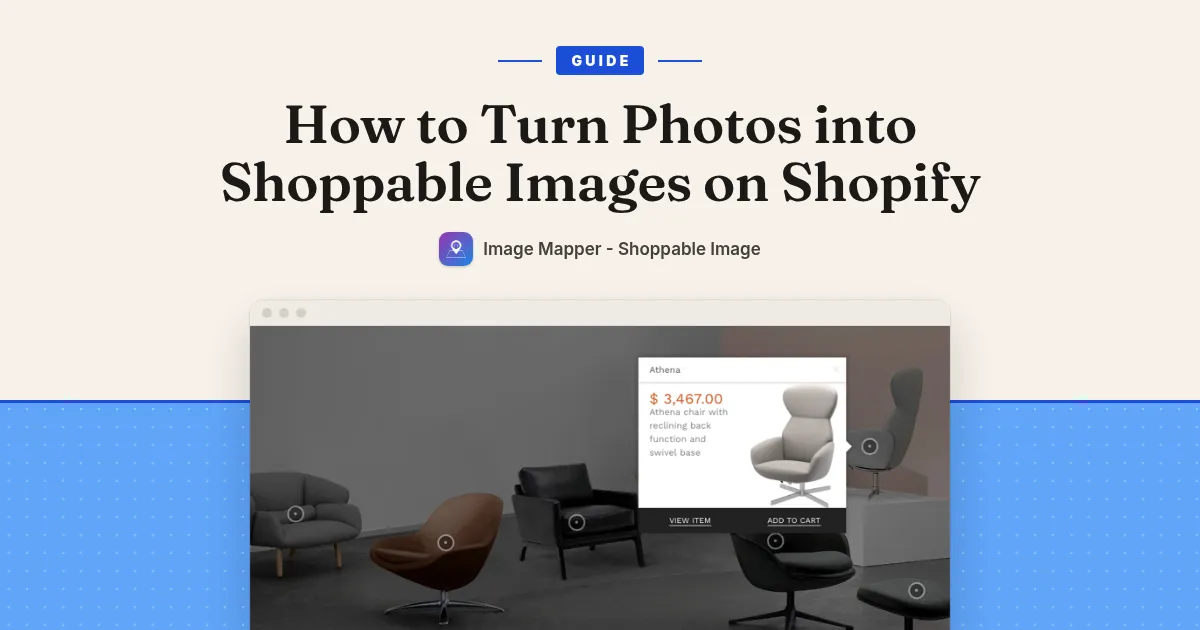
- The photo with pins. Each pin sits at the spot you chose on the image. The pins are positioned by percentage, so they stay on the same spot on a phone and on a computer.
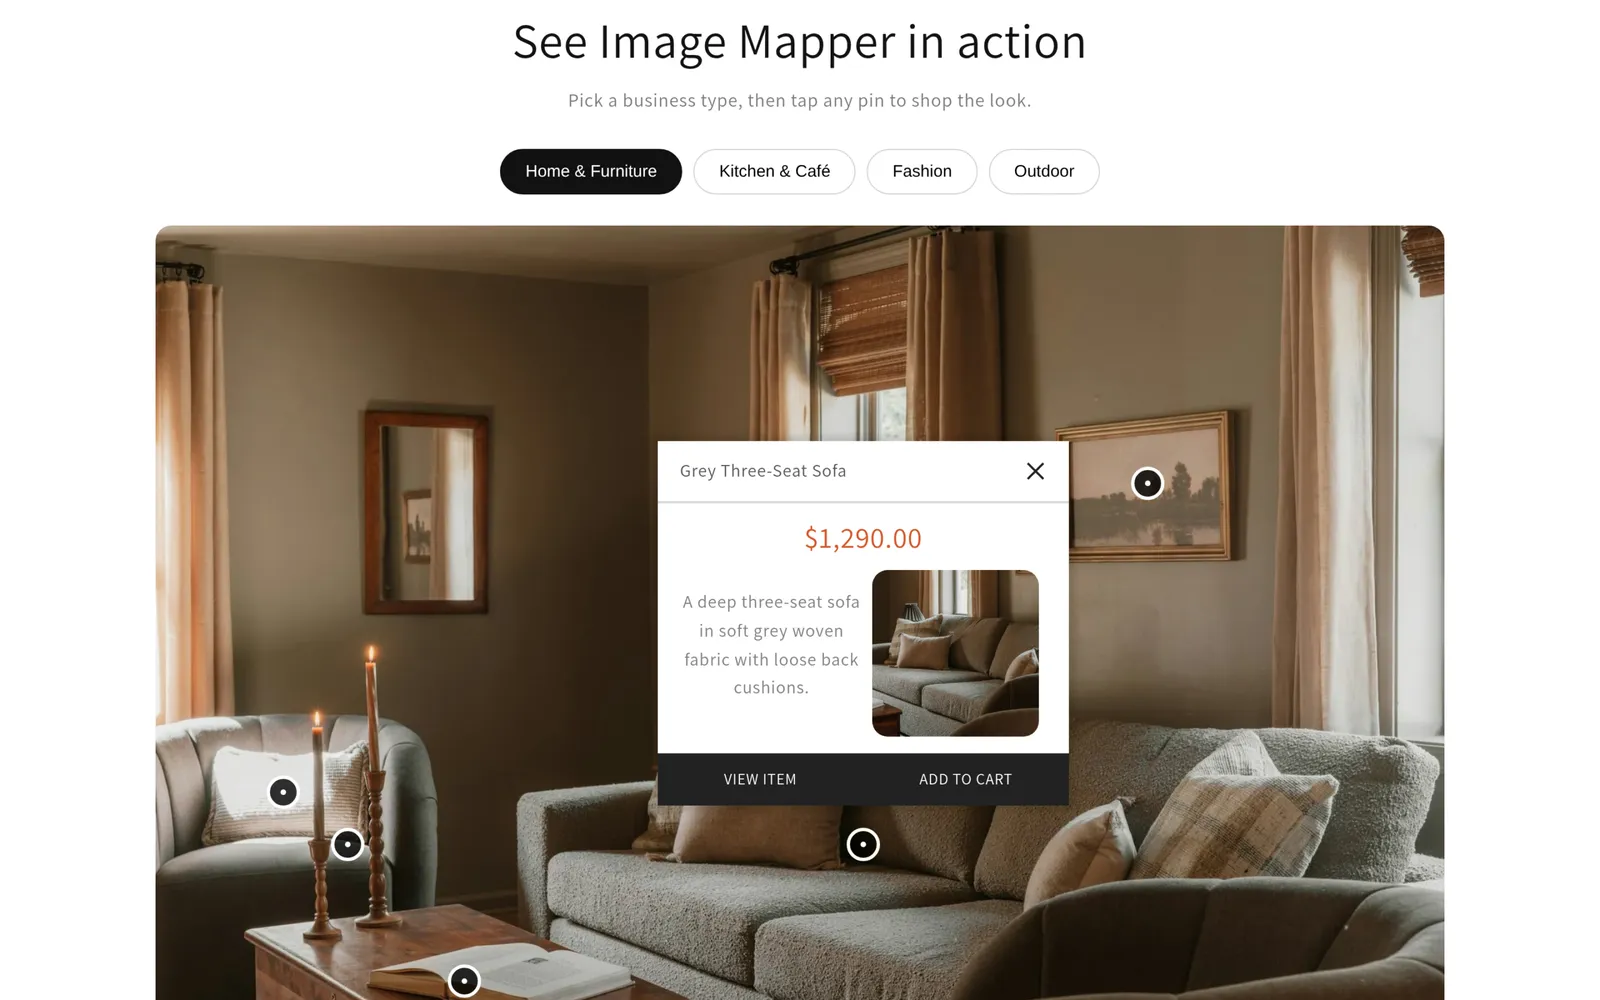
- A quickview on click. When a shopper taps a pin, a quickview opens with the product title, price, description and image, plus a variant selector if the product has options.
- Two buttons. VIEW ITEM goes to the product page. ADD TO CART adds the chosen variant without leaving the page and shows “Item added to cart!”.
- Hover on a computer. By default, hovering a pin shows a small tooltip with the product title, and clicking opens the quickview. (The tooltip is not used on phone-width screens.) If you switched on Show modal on mouse hover instead of click, hovering opens the quickview directly and there is no tooltip.
- Full width. If you switched on Force mapper fullwidth, the image spans the full browser width.
- Quickview carousel. If you switched on Enable image carousel on quickview modal, the quickview shows a swipeable carousel of all the product’s images.
- Background overlay. If you switched on Enable background overlay on modal opened, the image dims while the quickview is open, and clicking the dim closes it.
Last checked: October 2026
Image Mapper – Shoppable Image: https://apps.shopify.com/image-mapper